on
Curious Case of Y Axis Layer Shift
TLDR
My issue was loose eccentric nuts on the Y axis v-slot wheels. Ensure these are tightened, but also ensure the nuts on the x-carriage are also tight. If these are loose, then any adjustment on the eccentric nuts are irrelevant.
Frustration
Dealing with this issue was probably the most frustrating experience in my time owning a 3D printer. I started to understand the online meme of “Maintaining the printer is the hobby”. Ultimately I did pin down the issue, and that is what I’ll be going over below.
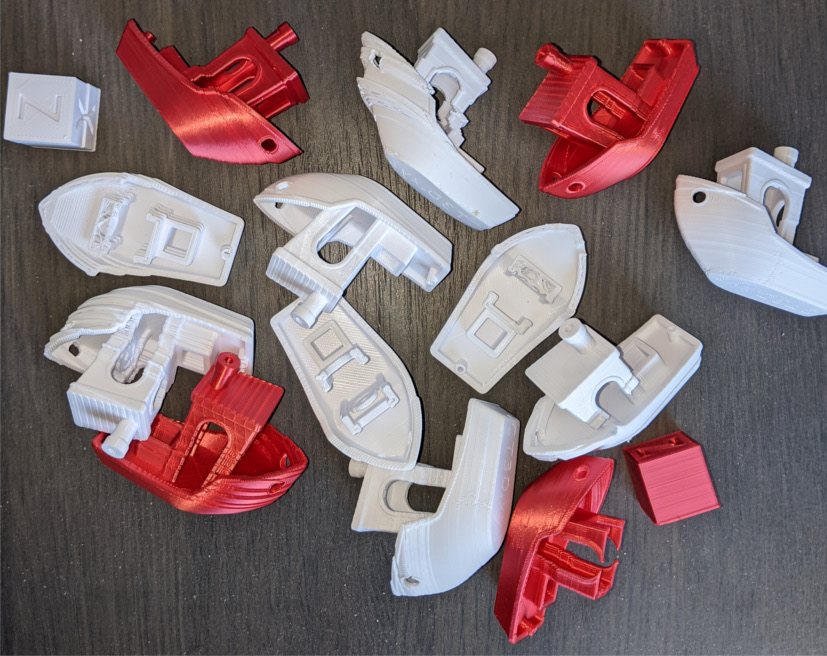
As you can see I’ve gone through many tweaks and iterations (that’s not even all of it):
The Problem
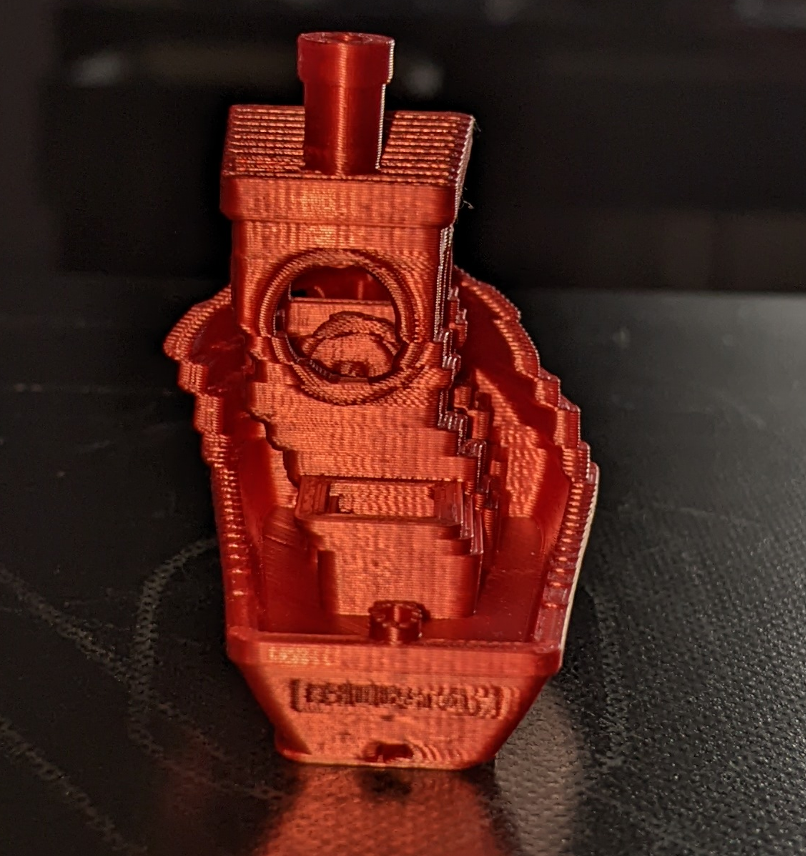
This is what layer shift looks like. As you can see the model is shifting in the Y-axis. I have experienced X-axis shift before, but this was my first time seeing it on the Y-axis.
Typical Solutions
The typical solutions found online will be to tighten the X and Y axis belts. I’ve fixed X-axis shift in the past with this method. However, I am only experiencing shift in the Y-axis and my Y-axis belt is sufficiently tightened (it strums like a guitar).
Other solutions typically involved slicer settings. Though, at least in my case, that would be a work around as I know this used to just work with stock CURA settings.
I did find that reducing the print speed helped to mitigate the layer shift, so for a lot of the testing I did I tried a few variants: 50mm/s, 55mm/s and 60mm/s.
What I tried
Since I ruled out the Y-axis belt pretty early on that left me investigating general issues with vibration and the stepper motors. At the time, I didn’t even realize the eccentric nuts were a thing I could adjust.
What I tried early on was putting packing foam (from the packaging my ender 3 came in) under the feet of my printer. This actually worked and allowed me to print a successful benchy:
However, this was a work around and I was still skeptical of the root cause of the layer shift. Also, the foam will compress over time landing you in the same situation not long after.
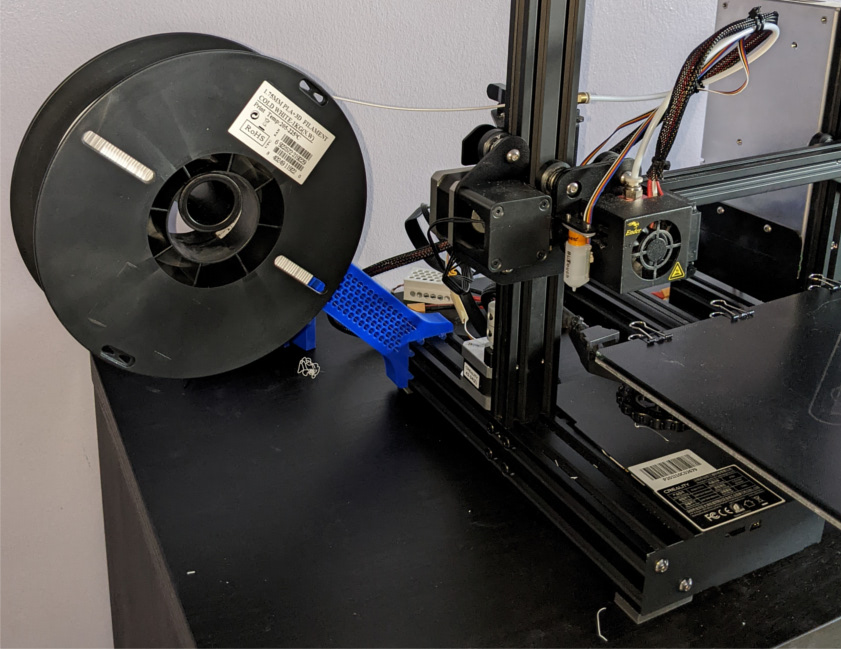
What I did learn from this was that the issue seemed to be vibration based. While testing I felt that the standard top mount of the spool was not ideal (having a +1kg mass vibrating at the top of the printer is probably not helping anyone), so I took the opportunity to print a side spool mount.
After this I looked into whether the issue was a bad stepper driver. I did this by swapping the X and Y steppers/limit switches. If the issue was the drivers you’d expect the shifting to follow into the X axis. I found Y-axis shift was still happening, so I could rule out the stepper drivers.
Reproducing the Problem
While testing a print for some LED panels I’m working on, I found that diagonal paths were likely to cause layer shift.
Below you can see that as the infill starts printing, the Y-axis shift significantly.
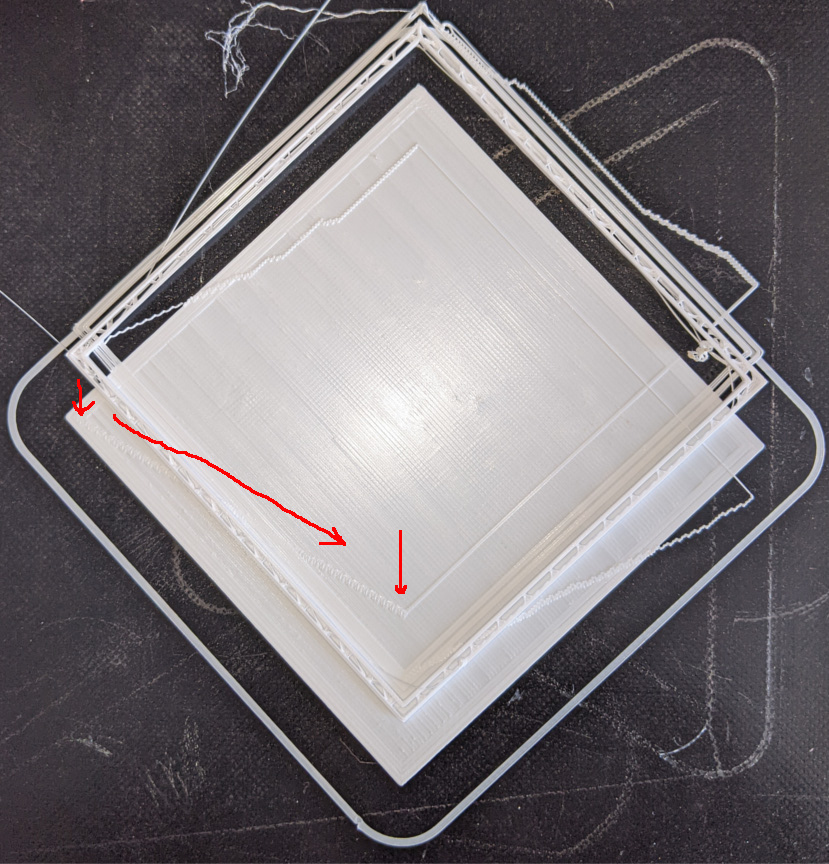
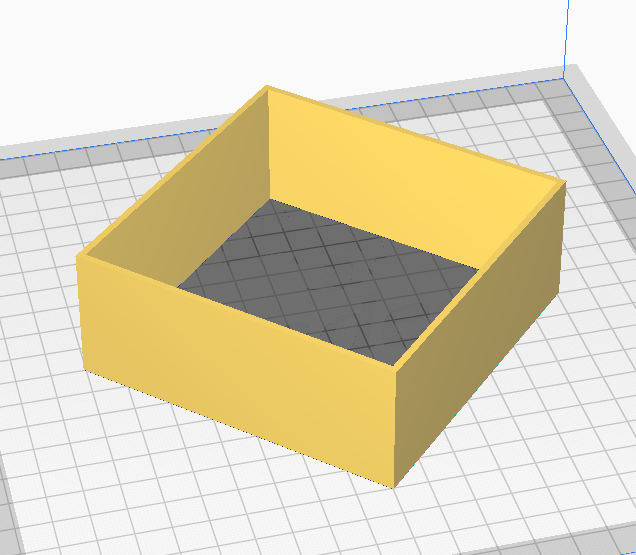
I figured printing a simple square would help me to see if I could identify the cause of the layer shift by watching the print. I found I could reproduce the layer shift with the following model. Being turned 45 degrees was key. I believe while the infill was printing (rapid zip-zag motion) there was enough vibration to cause a shift. It’s basically the panel I tried printing, without the panel to speed up the process of getting to the gcode that reproduces the layer shift.
Fixing the Problem
Now, when I learned about the eccentric nuts that adjust the v-slot wheel tightness I tried that. However, I found that while the shifting was significantly reduce it still occurred:
Immeasurable disappointment
What I found is that one of the nuts on the X-carriage was loose. This will affect the tightening of the eccentric nuts. So the fix was to adjust the eccentric nuts then tighten the X-carriage nuts (It’s possible that as I tried adjusting the eccentric nuts I loosened the X-carriage nuts).
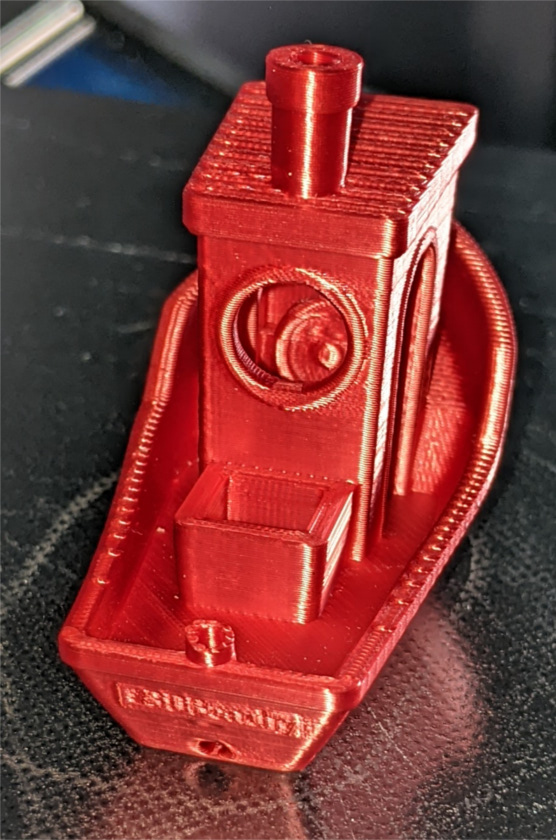
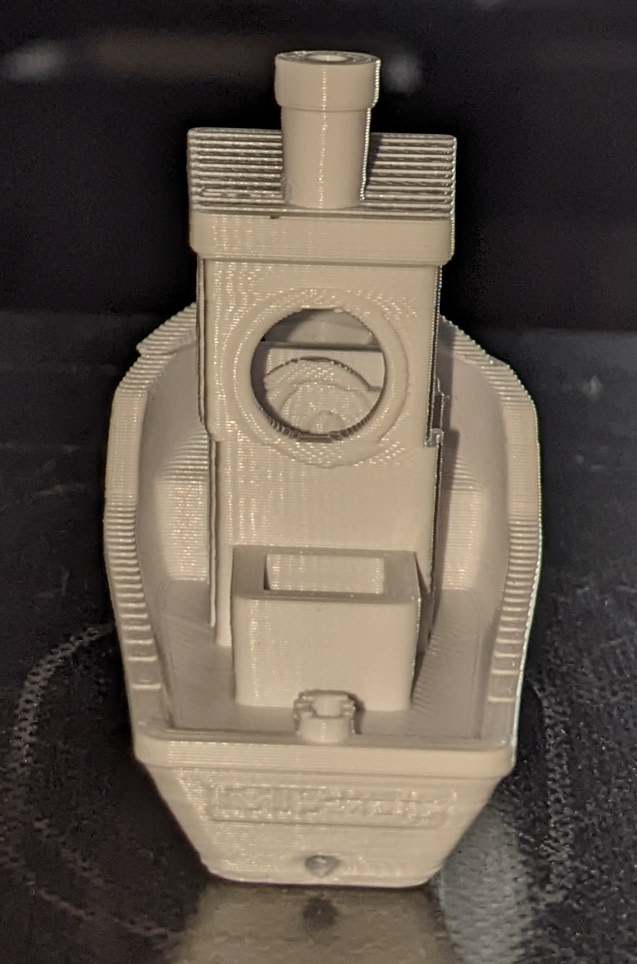
This finally resulted in a clean Benchy print at 60mm/s.
Future Improvements
I intend to print dampening feet for my printer to reduce vibration. While that will not prevent this from happening again (as screws and nuts will naturally loosen over time) it should prevent it from happening too often.
3 posts reference this page