on
Controlling a Dynamixel AX-12A with a Raspberry Pi and ROS 2
Got my hands on 5 Dynamixel AX-12A servos from work. I’m planning to make a little robot will them (well planning and finishing are different things).
I want to get going with ROS 2, so I’m using a Raspberry Pi 5. This post will cover some of the basic setup and examples.
Hardware
The motor’s I’m using: AX-12A

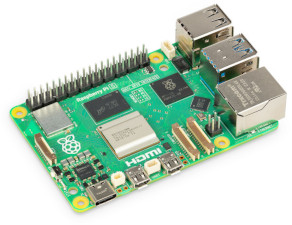
The Raspberry Pi 5:
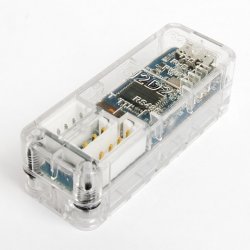
UART to Half Duplex converter (needed for talking to the motor from the raspberry pi):
Setup

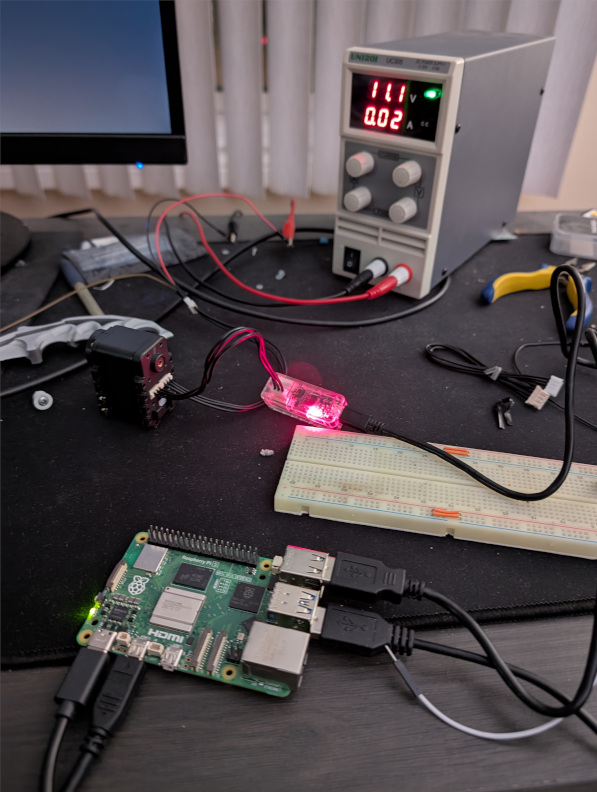
The raspberry pi is connected to the motor through the U2D2 half-duplex converter. The U2D2 does not supply power so that comes from a separate bench supply.
Also worth mentioning, there are two ports on the motor and either can be used as the input.
Python Examples
I started with just setting up the Dynamixel SDK and trying to run the examples.
git clone https://github.com/ROBOTIS-GIT/DynamixelSDK
cd DynamixelSDK/python

python setup.py install
Some important things to note. These are AX-12A servos, so a slightly older model. They use the v1.0 protocol. So those are the example scripts I’m running. You also have to pay attention to what motor model the script was written for. None of the examples are for the AX-12A, so parts of the scripts have to be edited.
The first change that has to be made is setting the serial baud rate to 1M. The scripts seem to try to change the baud rate of the motor (I assumed the motor has auto-baud detection or something). Though this doesn’t appear to work.
Now these are bus servos, so you communicate with them using a digital protocol instead of the usual PWM signals. You have to reference them by their IDs. I didn’t know what state these motors were in when I got them, so I attempted to factory reset them, using the factory_reset script and changing the ID to the broadcast address 0xFE.
# Default setting
DXL_ID                      = 254               # Dynamixel ID : 1
BAUDRATE                    = 1000000           # Dynamixel default baudrate : 57600
DEVICENAME                  = '/dev/ttyUSB0'    # Check which port is being used on your controller
I don’t actually know if this works, but the motors spin so there’s that.
Basic sign of life is to use the ping script to check if the motor responds.
python ping.py

Succeeded to open the port
Succeeded to change the baudrate
[ID:001] ping Succeeded. Dynamixel model number : 12
Now to actually control the motor, the control table parameters in the scripts need to be updated.
# Control table address
ADDR_MX_TORQUE_ENABLE      = 24               # Control table address is different in Dynamixel model
ADDR_MX_GOAL_POSITION      = 30
ADDR_MX_PRESENT_POSITION   = 36
Using the read_write example will command the motor.
Using ROS 2
mkdir -p ros_ws/src
cd ros_ws/src
git clone https://github.com/ROBOTIS-GIT/DynamixelSDK
cd ..

colcon build
The Dynamixel SDK contains ROS packages for controlling the motors.
Now with these examples they attempt to set the Operation Mode of the motor.
    def setup_dynamixel(self, dxl_id):
        dxl_comm_result, dxl_error = self.packet_handler.write1ByteTxRx(
            self.port_handler, dxl_id, ADDR_OPERATING_MODE, POSITION_CONTROL
        )
        if dxl_comm_result != COMM_SUCCESS:
            self.get_logger().error(f'Failed to set Position Control Mode: \
                                    {self.packet_handler.getTxRxResult(dxl_comm_result)}')
        else:
            self.get_logger().info('Succeeded to set Position Control Mode.')
The AX-12A doesn’t support this functionality. With the default settings, that register write will actually overwrite the temperature limit causing the motor to report over heat errors.
I commented out this code.
After fixing that and updating the control table registers, the ros can be run to control the motor.
ros2 run dynamixel_sdk_examples read_write_node.py
[INFO] [1745720701.167976637] [read_write_node]: Succeeded to open the port.
[INFO] [1745720701.192369945] [read_write_node]: Succeeded to set the baudrate.
[INFO] [1745720701.206688019] [read_write_node]: Succeeded to enable torque.
Publish to the set position topic to control the motor.
ros2 topic pub /set_position dynamixel_sdk_custom_interfaces/msg/SetPosition "{id: 1, position: 512}" -r 1
publisher: beginning loop
publishing #1: dynamixel_sdk_custom_interfaces.msg.SetPosition(id=1, position=512)
publishing #2: dynamixel_sdk_custom_interfaces.msg.SetPosition(id=1, position=512)
publishing #3: dynamixel_sdk_custom_interfaces.msg.SetPosition(id=1, position=512)
publishing #4: dynamixel_sdk_custom_interfaces.msg.SetPosition(id=1, position=512)
That’s where I’m at right now. The next steps will be ros_control support and velocity control mode (which is not explicitly supported, but technically possible).